Sunday, 27 January 2013

How To Search For Exploits Using Exploit-DB search BackTrack - Terminal


Hello guys,
In hacking we usually look for exploits to own the target, and today I'm going to show you how to look for exploits in Backtrack Inside your terminal!
What Many of us don't know, there is more than 15,000 exploits inside your backtrack written perl, ruby, python and more. But, today we'll learn how to search in those exploits easily, and faster than Googling!
When I use linux, I like to use the terminal for almost everything, and now, we will use it for exploit searching ;)
Lets start,

First of all open your terminal and type this command:

cd /pentest/exploits/exploitdb


as you can see, we have two files and a directory in that directory we entered. For now let's just focus on "searchsploit" file.
We will use this file to find the exploits on our PC, here is how to use it:

./searchsploit term1 term2 term3

what I mean in "term" is something that describes the exploit you're looking for, something that narrows down the search results to only the things you want.

For example, if you want an exploit for java inside windows, and we want the exploit to be DoS. Our command should look like this:

./searchsploit windows java dos

That .csv file contains all the names and paths of the exploits, and searchsploit try to find the right exploit for you
Easy, right?
Now you can change the terms and find the exploit you want.
Ok, so we get the exploit description, and a path...
As I mentioned before, there are two files, and one directory.. now we know what those two files do, it's the directory's turn now :P
that directory contains all of the exploits you need, and their paths.. so just enter, and copy the path to get it..
Let me show you an example.

We used the command:

./searchsploit windows java dos

and got some paths, here is how to get the exploits,

add "platforms" to the beginning of the path, for example
we got:

/windows/dos/11670.py

to read it use

cat platforms/windows/dos/11760.py


That's it you guys =)
Have fun, and happy pentesting!


Friday, 21 December 2012

How To Use Fast-Track | Fast Track Tutorial


Hello guys, Today I will show you how to use Fast-Track on Backtrack / Linux. Fast-Track is a tool used for exploiting. It uses other tools, to make pentesting a lot easier for us.
Fast-Track is available in three different forms,
  • CLI
  • Web
  • Interactive
My favorite is WEB, because it's much easier to use, and this tutorial will be based on it as well.
There are many things that Fast-Track can do, but in this tutorial, I will just generate a payload just to give you a general idea on how Fast-Track is used.
The first thing you need to do is, Open your 
menu > BackTrack > Exploitation Tools > Network Exploitation Tools > Fast-Track > fastrack-web

or if You want to use your terminal, Open your terminal and type the following commands:

cd /pentest/exploits/fasttrack
and then
./fast-track.py -g

you should get output like this:

now open your browser, and open this:

http://127.0.0.1:44444

you should get a Fast-Track page, it looks something like this:

That's basically 50% of our job! Now all we have to do is choose the option, and fill in the input that it needs, or choose the number of your option in the terminal!
Alright, Now lets see an example of using it, we will generate a metasploit payload using Fast-Track. Follow me!

First thing you need to do is click on Payload Generator from the list on the left:

Now Fast-Track will provide you with a little description about the option you chose, and some fields that you need to fill (no all the time).


Now click on launch, a terminal should pop-up and show you some options that you need to choose from, just enter the number of the option and click enter.

Look at the pictures:
I chose Windows Shell Reverse_TCP which is option number "1"
in this picture I also chose option number "1" which was "avoid_utf8_tolower"
In this step it is asking for the IP of the attacker, just enter your IP address. You can find your IP address using the command "ifconfig" and then enter the PORT
And the last step, it will ask you if you want to start a listener, I answered with "yes"
Thats it! Now look in the directory that contains fast-track.py, you will find your payload there! =)

See how easy it is? Now you just have to brows and check all the different options you have!

Thank you for reading! =)


Thursday, 29 November 2012

How To Secure Your Admin Panel Using .htaccess and .htpasswd


Hello guys,
Today I'm going to show you how to protect your admin panel with a username and password, and make it only accessible for admin IP addresses only!
And, if you have a login page outside of the admin panel, we will look it as well!
To start this, we first need the code bellow to secure the panel:


AuthUserFile /home/admin/.htpasswd
AuthName EnterPassword
AuthType Basic

require valid-user


order deny,allow
deny from all
allow from 111.222.333.444


Now change that code to suit your website, first change the path /home/admin/.htpasswd to the path that you have.
and change the IP address 111.222.333.444 to your IP address!

after editing the code, paste it into .htaccess file inside the admin directory, or just upload it!

Now we need the code bellow:

Security:Geeks
admin:password

You can add as many as you want in the same way.
after you're done, paste that code in the .htpasswd that you mentioned in the .htaccess code /home/admin/.htpasswd
Paste it there, or just upload it!

Finally, for those who doesn't have an "Admin directory" you can lock you admin page/login and make it only accessible for your IP address only!
To lock it, you need the code bellow:
<Files login.php>
Order Deny,Allow
Deny from all
Allow from 111.222.333.444
</Files>

in the code above, the login page is called "login.php" change the name to whatever your admin login page is called.

Now change the 111.222.333.444 to your IP address, then paste the code to the same directory of your login page. or upload it.

That's it guys, hope this was helpful for you.


Saturday, 10 November 2012

ASCII Art Generators Linux | Backtrack

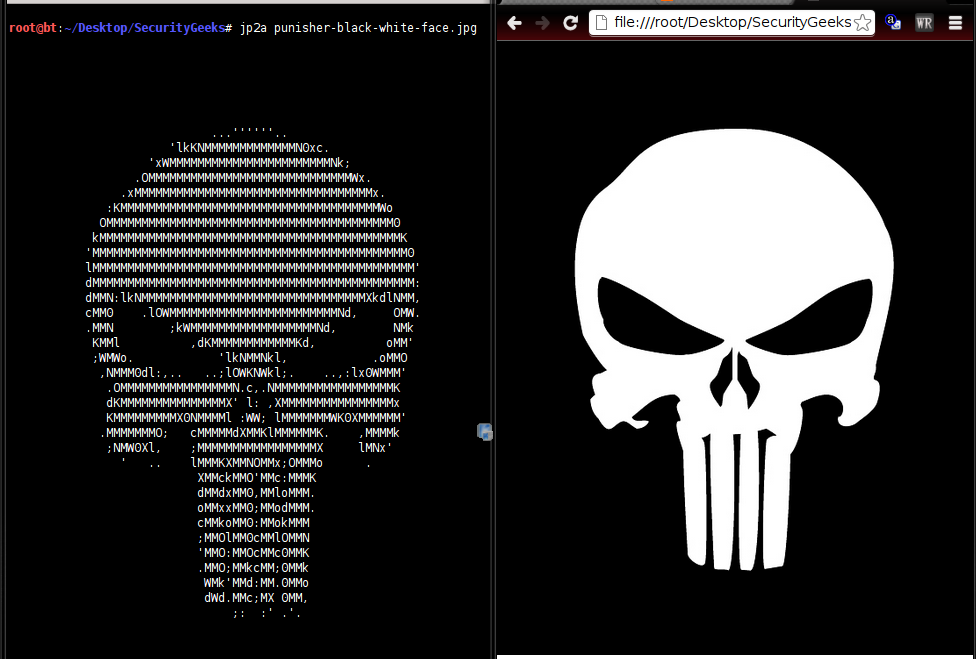
Hello again guys, today I'm going to show you how to generate ASCII Art in your Linux terminal. Things like this:                 


and even more!
Today I have three programs for you, two for ASCII fonts, and one for changing pictures.

# Figlet:
The above ASCII font is generated using Figlet. To install Figlet, run the following command:
sudo apt-get install figlet
Now all you have to do is type "figlet" in the terminal, and then type whatever text you want to generate! Just like the pictur bellow:

You can type "figlet --help" in your terminal for more options!

# Toilet:
Toilet is another program with the same idea as figlet, but with more cool options!
With this one, you can generate with colors, and more fonts!
In Toilet, you can use the same fonts that are available in figlet, but in this one you can change the colors.
In this program, you can also generate your colored font in an HTML code.
To install this program, type this in the terminal:

sudo apt-get install toilet


here are some examples for the fonts, and commands:

Different fonts:

Different colors:

HTML code generator:
and here are some of fonts names:

  • banner
  • big
  • bigmono12
  • bigmono9
  • block
  • bubble
  • circle
  • future
  • ivrit
  • lean
  • mini
  • script
  • shadow
  • slant
  • small
  • smblock

# Jp2a
Jp2a is a program to change any picture that you want, to ASCII art, and it generates HTML codes as well.

To install jp2a, run the following command in your terminal:
sudo apt-get install jp2a

now to change the picture to ASCII, just enter the directory of the picture, and run this command:


jp2a Picture.jpg


and if your picture is in .PNG, you have to convert it to .JPG first to change to ASCII. to convert run this command:
convert Picture.PNG Converted-Pictrue.JPG
Now just have fun!

if you want to generate an HTML code, run the following command:

jp2a --html Picture.jpg


Thats it guys :)
have fun, I hope you liked it!


Sunday, 4 November 2012

How To Scan A Website For Vulnerabilities Using BackTrack - Uniscan

Hello guys, today I'm going to show you how to scan for vulnerabilities in a website, or all the websites in the server.
In this tutorial I will use a program in BackTrack called UniScan. it's very easy to use, but very good in scanning.
First of all, open your terminal and type this command:
cd /pentest/web/uniscan && ./uniscan.pl


Something like this will be printed on your terminal. Now all we have to do is follow the instructions.

First of all we need a target to scan, I've chose one already and I will use it in my pictures.
To start the scan, first you have to check the options which you want to use in your scan.

# HOW TO USE OPTIONS:

Check the letter beside your option, and include it after the URL like this:
./uniscan.pl -u http://www.website.com/ -b -q -d -w

or put them all together.

./uniscan.pl -u http://www.website.com/ -bqdw

This will start your scan with all the different options you included.
NOTE:- NEVER FORGET THE FORWARD SLASH AT THE END OF THE LINK IN THE COMMEND!!

Now the scan will start, and the terminal will look something like this:

This scan will scan for vulnerabilities like SQL-i / LFI / RFI and so on. It also searches for Webshells, backdoors, PHP info disclosure, Emails, and much more.

Here are some examples:

PHP.info() disclosure:


External Links/Hosts:
Source Code disclosure:
Dynamic Scan, Vulnerability Identification:

This program can also get all the sites in a server, and then you will be able to scan all of them.
To do that, run this command:

./uniscan.pl -i "ip:127.0.0.1"


Change 127.0.0.1 to your target server. All the websites will be stored in "sites.txt" in the same directory.

Now to scan those sites in the list, run this command:

./uniscan.pl -f sites.txt -bqwd

You can change the options to whatever you want.

Thats it guys, thank you for reading :)

Download Uniscan HERE


Friday, 19 October 2012

How To Install MyBB, On Your Localhost

Hello guys, today I have a video tutorial made by me on how to install Mybb on your localhost using xampp.
The video is available in HD, and feel free to ask any question as a message on our Facebook page.

I hope you enjoy the video :)

Best Played In Full Screen Mode! & In HD! :)


Friday, 12 October 2012

How To Add A Custom Domain To Blogger

Hello guys,

So today I'm going to show you how to add a custom domain name to blogger blogs. this tutorial will be from Creating the blog, to adding the domain and using it. =)

First of all, you have to make the blog in blogger.com, call it anything you want because we will change the name with a custom domain after that.

It will look like the picture above. Remember the "Title" should be something unique because it will not change with the domain name. choose it carefully, and don't worry you can change it at anytime from blogger's dashboard.

After making the blog, go to you Domain name provider, (I Will use Dot.Tk for this tutorial - It's free) and apply those settings to your DNS records:


  Type                  HostName                              IP Address
A Record      -    YourDomain.Com             -    216.239.32.21
A Record      -    YourDomain.Com             -    216.239.34.21
A Record      -    YourDomain.Com             -    216.239.36.21
A Record      -    YourDomain.Com             -    216.239.38.21
CNAME       -    www.YourDomain.Com    - ghs.google.com

It will look like this:
NOTE:- Those setting will be exactly the same in any other register. even .com and .net domains.

After applying those settings, go to your blogger account again, open up your blog's dashboard, and follow those steps:
1- Click on settings from the list on your lift hand side in blogger:

2- Click on "Add Custom Domain" :

3-Then Click on "Switch to advanced settings" :
4- put your domain, and then save.
Blogger might ask you to verify you ownership of the domain, just follow their steps and you will be good to go =)
Enjoy your blogger with the new domain name =)